
Trimming cannabis buds is an essential skill for growers who want to maximize their harvest’s quality and potency. Whether you’re a first-time grower or a seasoned pro, knowing how to trim cannabis buds correctly can significantly affect the appearance, flavor, and overall experience of the final product. In this guide, we’ll walk you through the entire trimming process, from understanding the importance of trimming to providing professional tips and techniques to help you trim cannabis buds like an expert.
Why is Trimming Cannabis Buds Important?
Before diving into the techniques, it’s essential to understand why trimming cannabis buds is so important. Properly trimmed buds not only look more appealing but also enhance the potency and overall quality of your cannabis.
First, trimming helps remove excess leaves and stems, allowing the cannabinoids and terpenes in the buds to be more easily accessed. This improves the taste, smoothness, and aroma of the final product. Additionally, trimming helps prevent the growth of mold by ensuring air circulates freely around the buds during the curing process.
Moreover, trimming cannabis buds also helps you achieve a professional appearance that’s desirable for both personal and commercial use. Well-trimmed buds burn more evenly, offer a more consistent high, and create a cleaner smoke.
Tools You Need to Trim Cannabis Buds
To get started with trimming your cannabis buds, it’s important to have the right tools. Using proper trimming tools can make the process much more efficient and ensure a cleaner result. Here’s a list of tools you’ll need:
1. Trimming Scissors or Shears
Sharp, high-quality trimming scissors or shears are essential. There are two primary types of scissors to choose from: straight or curved. Straight scissors work well for larger, more open buds, while curved scissors are great for more detailed trimming in tighter areas.
2. Gloves
Wearing gloves can help keep the sticky resin from building up on your hands and prevent contamination of your buds. Latex or nitrile gloves are often the best choice.
3. Trimming Tray or Mat
A trimming tray or mat is a flat surface where you can place the buds while trimming. It catches any trimmings and makes cleaning up afterward much easier. Many growers opt for trays with raised edges to avoid losing any material.
4. Magnifying Glass or Jeweler’s Loupe
A magnifying glass or jeweler’s loupe can be invaluable for inspecting the buds more closely, allowing you to remove any tiny leaves or sugar leaves that are hard to see with the naked eye.
5. Curing Jars or Containers
Once your buds are trimmed, it’s crucial to place them in curing jars or containers to begin the drying and curing process. Proper curing is vital for preserving flavor and potency.
Preparing for the Trimming Process
Trimming cannabis buds is a time-consuming process, and doing it correctly requires some preparation. Here’s how you can prepare for the trimming session:
Harvesting Your Cannabis
Before you can begin trimming, you’ll need to harvest your cannabis. It’s best to trim your buds after they’ve been properly dried or cured, as trimming fresh buds can result in a sticky, difficult-to-handle mess. Ideally, let your buds dry for 5-7 days in a cool, dark place with proper ventilation before starting the trimming process.
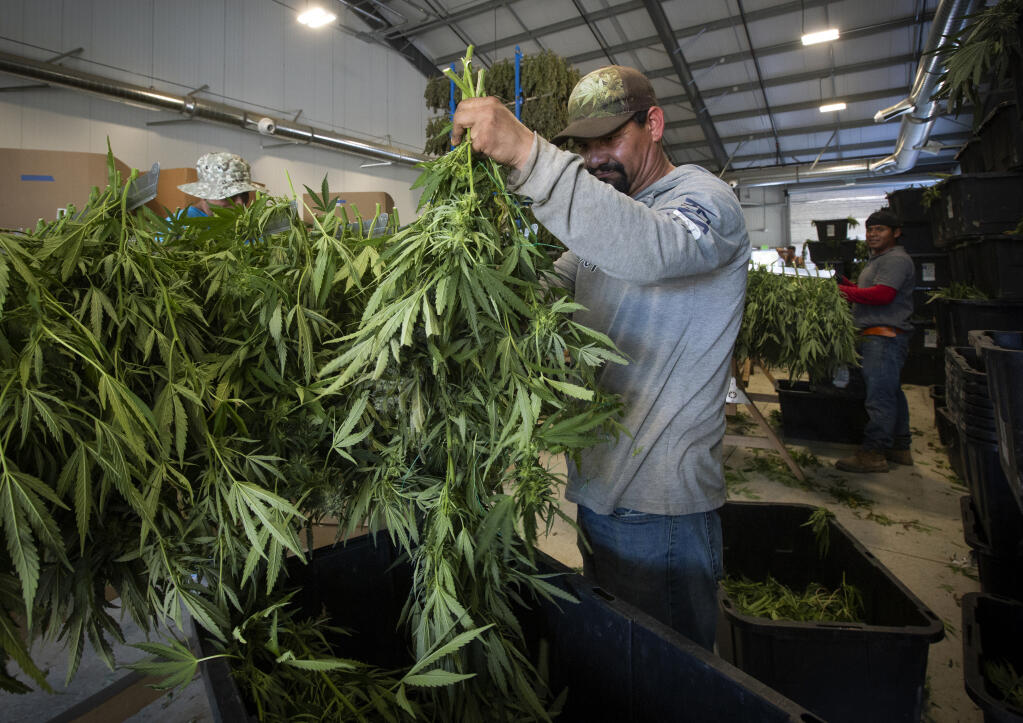
Set Up Your Workspace
Choose a clean, well-lit workspace where you can comfortably trim your cannabis. Ensure that you have all the necessary tools within reach, and organize your workspace to minimize distractions. Lay down a tray or mat to catch any trimmings and make cleanup easier.
Prepare the Buds
Before trimming, inspect each cannabis plant and remove any dead or damaged leaves. This is also a good time to assess the quality of the buds and determine how much trimming is necessary.
The Trimming Process
Once you’re set up and ready to go, it’s time to begin trimming. The process involves cutting away unwanted leaves, stems, and other plant matter to reveal the beautiful, dense buds underneath.
1. Start by Removing Larger Leaves
The first step in the trimming process is to remove the larger, fan leaves that surround the buds. These leaves usually don’t contain much resin and can be easily removed with trimming scissors. Hold the bud gently and trim the larger leaves from the base of the bud, taking care not to cut into the actual flower.
2. Trim the Sugar Leaves
Sugar leaves are the smaller leaves that surround the buds and are covered with resin. These leaves contain cannabinoids and terpenes but are often trimmed away to make the bud more visually appealing and easier to smoke. Use your scissors or shears to carefully trim the sugar leaves, following the contours of the buds. The goal is to reveal the trichomes without damaging the buds.
3. Shape the Buds
Once the larger leaves are removed, you can begin to shape the buds. This involves trimming away any excess small leaves and stems that might be protruding from the buds. The key here is to make the buds look compact, dense, and aesthetically pleasing. Try to shape them evenly on all sides for a professional appearance.
4. Handle with Care
Cannabis buds are delicate, so it’s crucial to handle them carefully throughout the trimming process. Avoid squeezing the buds too hard, as this can damage the trichomes and affect the quality of the final product. Always use a gentle hand and work slowly to ensure precision.
5. Inspect and Finalize
After you’ve finished trimming each bud, take a moment to inspect it closely. Check for any remaining leaves or stems that need to be trimmed away. If needed, use a magnifying glass or jeweler’s loupe to check for any fine leaves or imperfections you might have missed.
Professional Tips for Trimming Cannabis Buds
1. Use Wet Trimming or Dry Trimming
There are two main methods for trimming cannabis buds: wet trimming and dry trimming. Wet trimming involves trimming the buds immediately after harvesting, while dry trimming is done after the buds have been dried.
- Wet trimming can be quicker but may leave the buds more sticky and harder to handle.
- Dry trimming allows you to handle the buds more easily but can take longer.
Both methods are effective, so it ultimately depends on your personal preference and the condition of your harvest.
2. Keep Your Tools Clean
To ensure that you get clean cuts and avoid transferring contaminants to your buds, make sure to clean your scissors regularly. Wipe them down with alcohol or a similar cleaning solution to remove any sticky resin buildup.
3. Trim in Small Batches
If you’re trimming a large harvest, it’s easier to work in small batches. This prevents you from feeling overwhelmed and helps maintain the quality of your buds.
4. Trim Early in the Day
Trimming cannabis buds can take a long time, so it’s a good idea to start early in the day when you have plenty of energy and focus. This will help you maintain a high level of precision throughout the process.
Post-Trimming: Curing and Storing Your Buds
After trimming, your buds are ready to be cured and stored. Proper curing is crucial for preserving the flavor, aroma, and potency of your cannabis. Place your trimmed buds into curing jars and store them in a cool, dark place. Open the jars daily for the first few weeks to allow for air exchange and moisture control.
Conclusion
Trimming cannabis buds like a pro requires patience, attention to detail, and the right tools. By following the techniques outlined in this guide, you can ensure that your cannabis buds are neatly trimmed, aesthetically pleasing, and ready for consumption. Whether you’re trimming for personal use or preparing for sale, proper trimming will enhance the overall quality of your cannabis and provide you with a more enjoyable experience.